Cannabis mother room biosecurity guide
MyFloraDNA · Published 2026 · Last updated April 2026
Testing cadence, sanitation protocols, quarantine procedures, and staff practices that define a functional mother room biosecurity program. Because contamination events in the mother room don’t affect one harvest — they affect every harvest, from every room, for every cycle until detected.
Why it matters
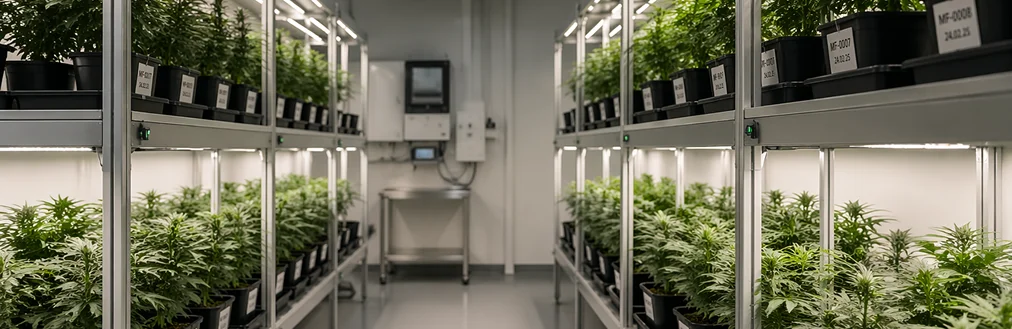
The mother room is the highest-risk zone in your facility
One infected mother plant in an unscreened room can spread HLVd through every flowering room silently, across multiple cycles, before the financial damage appears in harvest data.
A pathogen in the flowering room affects one harvest. A pathogen in the mother room affects all of them.
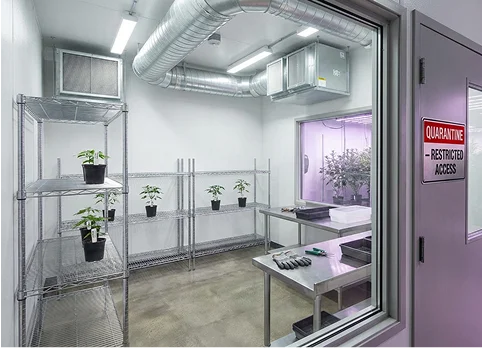
A mother room is a dedicated space used to maintain selected mother plants in continuous vegetative state. Every plant in the facility traces back to this space. If a mother plant becomes infected, that infection passes to every clone taken from it — and to surrounding plants through contaminated tools, shared irrigation, or handling. This is why mother rooms require strict environmental control, routine monitoring, and proactive pathogen testing.
Biosecurity in a cannabis facility starts in the mother room, because that’s where contamination events have the highest downstream consequence. This guide covers the testing cadence, sanitation protocols, quarantine procedures, and staff practices that define a functional mother room biosecurity program.
When to test and what to test
A biosecurity program without a testing cadence is a reaction plan, not a prevention plan. Every testing event below is a firewall — the purpose is to catch pathogen introduction before it reaches the propagation cycle.
| Testing Event | Who / What | Panel | Trigger |
|---|---|---|---|
| Incoming genetics screen | Every new clone, mother, or seed lot entering facility | Pathogen Shield™ (HLVd + Pan-Fusarium + Botrytis), CCV, Pythium | Before any new material enters the mother room |
| Mother room baseline | All mother plants | Pathogen Shield™, CCV, Pythium | Quarterly minimum — monthly for high-density operation |
| Post-quarantine clearance | Plants held in quarantine after a positive result | Pathogen Shield™, CCV, Pythium | Required before any movement out of quarantine |
| Pre-TC entry | Material entering tissue culture | Pathogen Shield™, CCV, Pythium | Before any TC work begins |
| Post-TC verification | Plantlets after regeneration, before distribution | Pathogen Shield™, CCV, Pythium | Before Gen 0 stock leaves the laboratory |
| Unexplained decline | Plants showing quality, or health anomalies | Symptom-specific panel + targeted follow-up | Any time unexplained symptoms appear |
The quarterly mother room baseline is the minimum. Operations that frequently source external genetics, run large mother rooms, or have experienced a previous HLVd event should move to monthly
screening. At 4–5 harvest cycles per year, a quarterly screen leaves a 3-month window in which an undetected infection can distribute infected cuttings across multiple rooms before the next test.
Pythium testing is especially critical for clone production and hydroponic or high-moisture systems where root pathogens spread rapidly.
Frame testing cost correctly. The cost of quarterly mother room testing across a room of 50 plants is a small fraction of the revenue loss from a single missed HLVd event. Frame testing cost as a per-harvest insurance line item, not a lab expense.
The highest-risk introduction event
External genetics are the most common point of HLVd entry into a clean facility. Every new clone, mother plant, or seed lot that enters without a documented clean test result is an uncontrolled introduction risk — including genetics from trusted partners, licensed nurseries, and established breeders, because HLVd can be present without any visible symptoms.
Incoming genetics protocol — 5 steps
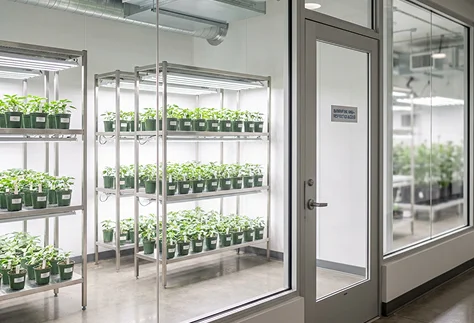
Receive into quarantine only
New material goes directly to a physically separated quarantine space. Do not bring it into the mother room, onto shared benches, or near existing plant inventory.
Test immediately
Submit tissue samples for a full multiplex panel: HLVd Shield™ (HLVd + Pan-Fusarium + Botrytis), CCV, Pythium. Do not take cuttings from quarantine material before results return.
Hold until results
No quarantine material moves out of the quarantine zone until a clean panel result is received and documented.
Integrate on clean results only
On confirmed clean status, material may move into the mother room. Document the test result and date of integration in plant records.
Re-test after first propagation cycle
Some infections appear at low load on the first test and amplify after one propagation cycle. A second test 4-6 weeks after integration catches early-stage infections below the limit of detection at intake.
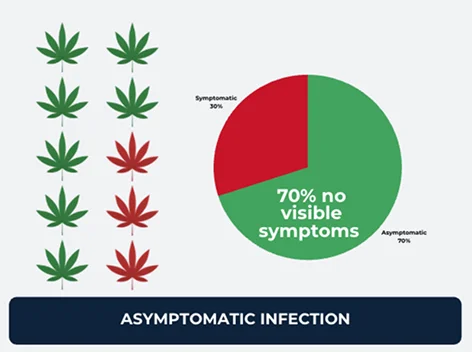
⚠ Never skip the quarantine hold
The most common failure is integrating new material before results return because the source “seemed clean”. HLVd has no visible early-stage symptoms — trust the test result, not a visual inspection. 70% of plants infected with HLVd show no symptoms. (Punja et al. 2024)
Preventing mechanical transmission
HLVd spreads mechanically. Every cutting tool, gloved hand, and surface that contacts infected tissue is a potential transmission vector. Routine sanitation practices such as alcohol wipes and glove changes can reduce risk, but inconsistencies in application make them unreliable as a sole control strategy. The viroid can persist on surfaces — including metal and glove materials — long enough to facilitate transmission between plans.
Cutting tool sterilization methods
| Method | Effectiveness | Notes |
|---|---|---|
| Flame sterilization | ✓ Reliable | Pass blade through flame until metal glows. Cool before use. No chemicals needed — most reliable method. |
| 10% bleach solution | ✓ Effective | Immerse cutting surface for min. 30 sec between each cut. Replace solution every 30 min. Plant sap reduces effectiveness. |
| Isopropyl / Ethanol alcohol | ✗ Not sufficient | Does not reliably inactivate viroid RNA. May be used for surface cleaning but not between-cut tool sterilization. |
| H₂O₂ / Virkon | ⚠ Unreliable | May reduce pathogen load under controlled conditions but not reliable in the presence of plant sap. Not standalone sterilants. |
Glove and hand hygiene
- Change gloves between mother plants during cutting sessions. Sap transfer on glove surfaces is a confirmed transmission route.
- If changing between every plant is not feasible, change between every 5 plants minimum, and mmediately after contact with suspect material.
- Wash hands with soap and water before entering the mother room.
- Do not handle soil, outdoor-sourced material, or other plant material immediately before mother room work.
Surface and bench sanitation
- Remove all plant debris before applying disinfectants — organic material can protect HLVd from chemical inactivation.
- Disinfect propagation benches with 10% bleach solution before and after each cutting session.
- Do not allow cuttings from different mother plants to contact each other on shared trays or surfaces prior to rooting.
- Clean and disinfect rooting trays between uses. Do not reuse growing media that has contacted HLVd-positive material without sterilization.
Immediate response to a positive result
A positive HLVd result requires immediate action. The most dangerous response is delay — keeping the infected plant in place while deciding what to do, or continuing to take cuttings while waiting for a confirmation test.
Stop propagation immediately
Cease all cutting activity. Do not take material from the positive plant or any plant that shared tools, surfaces, or workflow during the last cutting session.
Flag and physically isolate
Move the positive plant to a dedicated quarantine space, physically separated from all mother stock. Label clearly. Handle only with fresh gloves and dedicated tools.
Trace the last cutting session
Identify all cuttings taken from this plant since the last confirmed negative test. Flag all derived material (unrooted and rooted) for re-testing before advancing to vegetative or flower.
Re-test adjacent plants
Plants that shared bench space, irrigation lines, or tools with the positive plant are at elevated risk. Test before the next cutting cycle.
Decision on the positive plant
If genetics are replaceable: remove and destroy to eliminate the infection source. If proprietary and irreplaceable: maintain strict quarantine and pursue tissue culture recovery.
Sanitation reset
Perform full sanitation of tools, benches, trays, and all surfaces involved in the prior cutting session before resuming operations.
For proprietary genetics that can’t be discarded, meristem tissue culture is the only reliable path to pathogen-free stock from infected material. Contact MyFloraDNA to discuss tissue culture recovery options — see the TC Platform for details on the Genetic Renewal program.
Biosecurity fails at the human level
The most common biosecurity breakdown is not a failed test or a missed pathogen. Contamination and infection spread is most often caused by team members not following protocols due to incomplete training, lack of supervisory oversight, or because the urgency was not communicated clearly enough.
Training requirements
Explain the why, not just the what
Every person who enters the mother room should understand why HLVd spreads mechanically and what the consequences of a mother room infection are. This is not bureaucratic training — it is motivation for compliance.
Demonstrate, don’t just document
Tool sterilization and glove change protocols should be demonstrated, not just documented. Watch the procedure being performed before certifying compliance.
Establish a clear escalation path
Who gets notified immediately when a test result returns positive? Do not leave this ambiguous. Define the escalation path before it is needed.
Documentation standards
Pathogen test records
Date and result of every test, linked to the specific mother plant and genetic line.
Incoming genetics log
Source, date of receipt, quarantine start date, test result, integration date — for every new introduction.
Cutting session records
Date, plants cut, tools used, person performing the work — for every cutting session.
Retention: minimum 2 years
In the event of a contamination event, records allow you to trace the introduction point and the extent of distribution.
Why records matter
Documentation is not compliance paperwork. It is the diagnostic tool that tells you when and where an infection entered your facility, and how far it spread before it was caught. Facilities without cutting records cannot perform that trace.
Build your testing protocol on verified results.
Submit a sample and get quantitative pathogen data via MyFloraCLOUD in 72 hours or less.
Frequently Asked Questions
Test every mother plant, and test multiple sites on each plant (new growth, top, fan leaves, and roots). HLVd is not uniformly distributed within a plant or across a mother room — one plant can be infected while adjacent plants test clean. Sampling a percentage of the room will miss infections in untested plants. The cost of full mother room screening is modest compared to the risk of a partial screen that misses an active infection.
A negative result from a validated panel with confirmed controls means the target pathogen was not detected at or above the assay’s limit of detection at the time of sampling. Very early-stage infections may be present at concentrations below the limit of detection. This is why the re-test 4–6 weeks after incoming genetics integration is important — it catches infections that were below the detection threshold at intake.
Flag all cuttings traced to the positive plant and hold them in a separate quarantine area. Test them before any move to vegetative or flowering. If cuttings have already been distributed to other rooms, notify the relevant room managers and test those plants at their next scheduled interval with elevated priority.
Viroid RNA is relatively stable and can persist on metal cutting surfaces and bench tops for a period of hours to days. This is why wiping tools with water between cuts is insufficient — flame sterilization or bleach treatment is required to inactivate the viroid reliably.
In-house PCR is possible for operations that have validated laboratory equipment, trained molecular biology staff, and access to validated assay kits with characterized LOD and specificity. For most cannabis operations, the capital investment and technical requirements make third-party laboratory testing more practical and more reliable. Validation of in-house assays against a reference laboratory is strongly recommended before relying on in-house results for quarantine decisions.
Resources
Related Guides
Diagnostics, biosecurity, and remediation guidance